In this tutorial, I’m going to show how I installed LineageOS 17.1 with disk encryption and microG in my Nexus 5.
hammerhead
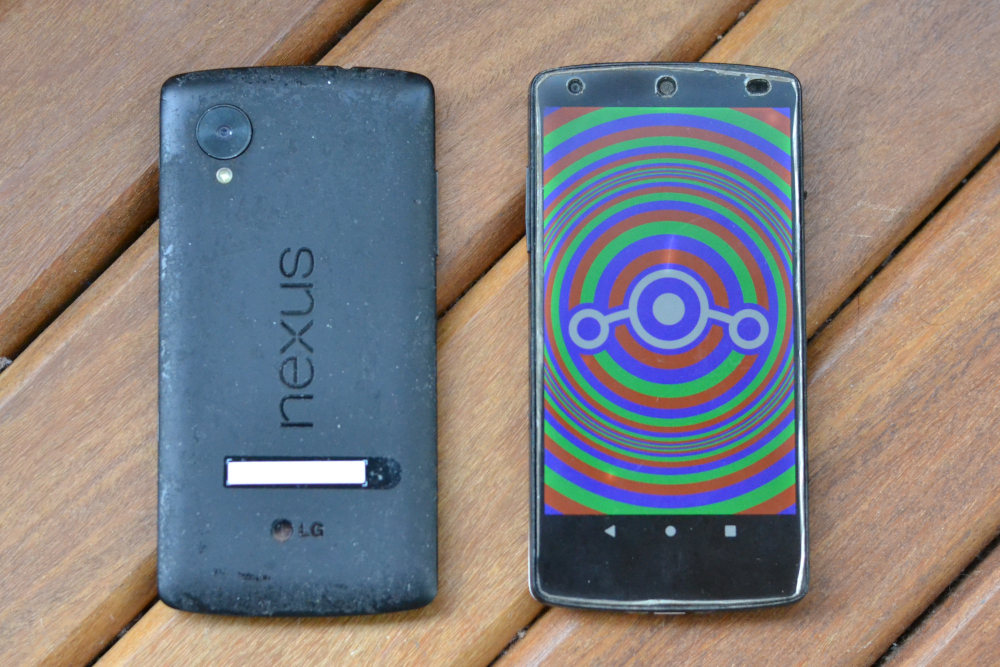
Nexus 5 is an old phone. It was launched in October 2013 (designed by Google, manufactured by LG), but differently than some 2013 phones, it still works! Even in 2020, I’ve used it as daily driver and it works quite well for my use case. All peripherals still works, I can use 5GHz Wi-Fi and 4G mobile data (it even supports wireless charging!). The battery life can carry on for one complete day. The quality of photos is not as good as current phones, the device isn’t super fast for some tasks and I needed to replace the battery once, but overall it is enough for basic messaging and internet browsing.
However, even if works fine, the vendor doesn’t provide official support anymore and was discontinued in march 2015. The initial Android version was 4.4 “KitKat”, it got updates until Android 6.0.1 “Marshmallow” in December 2015, with a lifetime of a bit more than 2 years.
It got a good reception, as was one of the most balanced products in terms of price and performance, along with the robustness and well made. The first release got some problems like battery life and an unstable camera, however, those problems got better on following Android releases.
GSMArena collects information about the hardware and also have some comments and reviews from users, like those:
JMac: My girlfriend uses my old Nexus 5 and I was surprised to find the other day that it can get a 4G signal. Don’t think we had 4G in 2013.
Alphadurus: Unbelievable how so many users still using nexus 5 in 2020, I got mine replaced 3 years back.. Nexus 5 was a beast for sure but widt poor battery. I got 2 hours sot max. But it was the best phone for rooting and adding modded os.. still the king of good times..
sajith: I’m using my nexus 5 from July 2014. This is one of the best mobile phones I have ever used. Still no lags.
In XDA Developers forum, is possible to see that the community around this device has tons of ROMs, posts and comments. The process of flashing a ROM can take some minutes but it’s very straightforward, so I invite you to browse XDA and try some ROMs for you to find out what fits your purpose. I won’t be explaining each piece of the stack in the tutorial, but here are some helpful links:
The tutorial
DISCLAIMER: inserting a new operation system in your phone shouldn’t make it unusable forever (also know as bricking), but it could. Steps described here worked fine in my device and I did my best to be as descriptive as possible, but unfortunately I can’t assure that will work in all cases. Only proceed following the commands only if you are comfortable with the procedure.
I’m using GNU/Linux for this tutorial. Make sure you have adb and fastboot
installed in your system. In Arch Linux, this can be found in the package
android-tools.
Unlocking the bootloader
Your device comes with a bootloader that is locked by default, so you can’t flash any new cool ROMs as it is. However, the unlocking procedure is no trouble. This is a common pattern for devices from Google, and it’s very helpful. Some vendors can make this procedure very hard, and some can be even impossible! Instructions from LineageOS wiki:
-
First step, boot in your current ROM and go to settings.
-
Tap 5 times in the “Build number” to enable developers options.
-
Go to developers option and enable USB debug. Connects the device to a computer using a USB cable.
-
Boot to the bootloader:
- Shut the device down, and press Volume Down + Power
- Or, run
$ adb reboot bootloaderin your computer.
-
Check if the computer detects the device:
sudo fastboot devices
-
Unlock the bootloader. Notice that this step will remove the warranty, but you don’t have one anymore right?:
sudo fastboot oem unlock
-
A screen with options will appear. Use the volume buttons to select YES and press power to confirm. If the device does not reboot, reboot it.
Flash a custom recovery
Nexus 5 has a recovery mode that allows us to wipe data from a device and to factory reset it. Using a custom one gives us more powerful options, like flashing a new ROM. The most famous custom recovery project is maintained by Team Win Recovery Project (TWRP) and trusted by the community.
For this device specifically, we are going to use a slightly different one.
It’s a fork that comes with a small tool that increases the size of system/
partition and decreases the cache/ one. This is done because the stock
partitioning scheme is too small for current Android/LOS images.
You can download it from XDA, and it also provides some useful information about the tool.
After downloading it, go to phone’s bootloader and flash the recovery:
fastboot flash recovery <recovery_filename>.img
Now, boot to the recovery mode using the bootloader menu.
Wipe the old system using the Wipe menu. First, tap Format Data. After that is completed, get back to Wipe menu, select Advanced Wipe, after that select the Cache and System partitions and then Swipe to Wipe.
Repart the filesystem
Go to Advanced menu and select Terminal. Use the following command to resize it:
hh_repart -m
Wait until it reboots.
Install LineageOS
There are tons of ROMs around XDA for Nexus 5. The flash process is basically the same for all them, so I recommend you to check out some ROMs and find which one is better. I chose the unofficial release of LineageOS 17.1 and you can download it in XDA. Then, in recovery mode, select Advanced and ADB Sideload. On host machine, run:
sudo adb sideload <lineage-17.1-file.zip>
With this step, LineageOS is installed on the mobile.
Encryption
If you want to use disk encryption (something I highly recommend), you need to perform some extra steps before using it. These are the steps I did in order to make it work:
- Boot in system. again.
- Setup a password or lock pattern. You can change the pattern matrix from 3x3 to up to 6x6.
- Go to Settings > Security and click in the “Cryptography” option.
- Wait until it’s finished, and we are done!
If your device doesn’t want to boot, you can try those steps (without losing the encryption):
- After it gets completed, get back to recovery.
- In Settings, mark the option
use rm -f instead of formating. - Get in Wipe and mark Data in Advanced Wipe.
- Get back to the system. The phone should be encrypted and ready to be used.
MicroG and friends
In order to make MicroG work properly, we need to enable signature spoofing1,
so MicroG will pretend to be Google Services + Play Store and apps will work as
expected (at least, most of times). The first step for doing so is
installing Magisk,
a “suite of open source tools for customizing Android”. I installed version
20.4 and it worked fine. Use the adb sideload method to install it and boot
your phone.
Open Magisk, go to Download and search for the following modules: Riru Core and Riru EdXposed. Those modules will help us to modify the behaviour of apps. You will also need to install EdXposed Manager. A pop up should appear notifying that, but you can also download it here.
Open EdXposed Manager and install the module fakegapps, finally allowing
signature spoofing. You need to manually enable it inside EdXposed. Boot the
system in recovery again. Now, it’s time to install MicroG.
FriendlyNeighborhoodShane developed a nice zip containing all the software you
need to use MicroG. I
downloaded the NoGoolag-2.7 version at GitHub.
To learn more about the difference of releases, check out the
README.
Boot the device once more, and open the MicroG self test, in MicroG settings.
Everything should be marked and looking good there. A lot of apps are really
not that useful without Push Notifications, so you may want to enable it at
“Device registration” and “Google Cloud Messaging”. There’s an app called
Push Notification Tester
that you can download from Aurora Store (the alternative to Google Play) and check
if it’s working as expected. If it’s not, try dialing *#*#2432546#*#* and
rebooting one last time. It might take some minutes (and some reboots) in order
to start working, so be patient.
Conclusion
Thank you for recycling a device, the planet says thanks. However, if LineageOS hackers get tired of it and none release new ROMs, it might be time to search for another mobile… or use postmarketOS.
-
Discussion on Reddit.
-
Discussion on Hacker News.
-
Free Software Foundation Europe wrote a cool article explaining what is signature spoofing in the context of Android. ↩︎